Sunday, December 31, 2023

Flawless Floors: Mastering the Craft of Floor Sanding

Welcome to the world of flawless floors, where the beauty and functionality of your floors are maintained through the craft of floor sanding. Floors are an essential part of every building, and they go through a lot of wear and tear over the years.

Floor sanding is an effective way to restore the shine and beauty of your floors and improve indoor air quality. In this blog post, we will take a deep dive into the world of Floor Sanding in Melbourne and provide a step-by-step guide to help you master the craft.


Understanding Floor Sanding

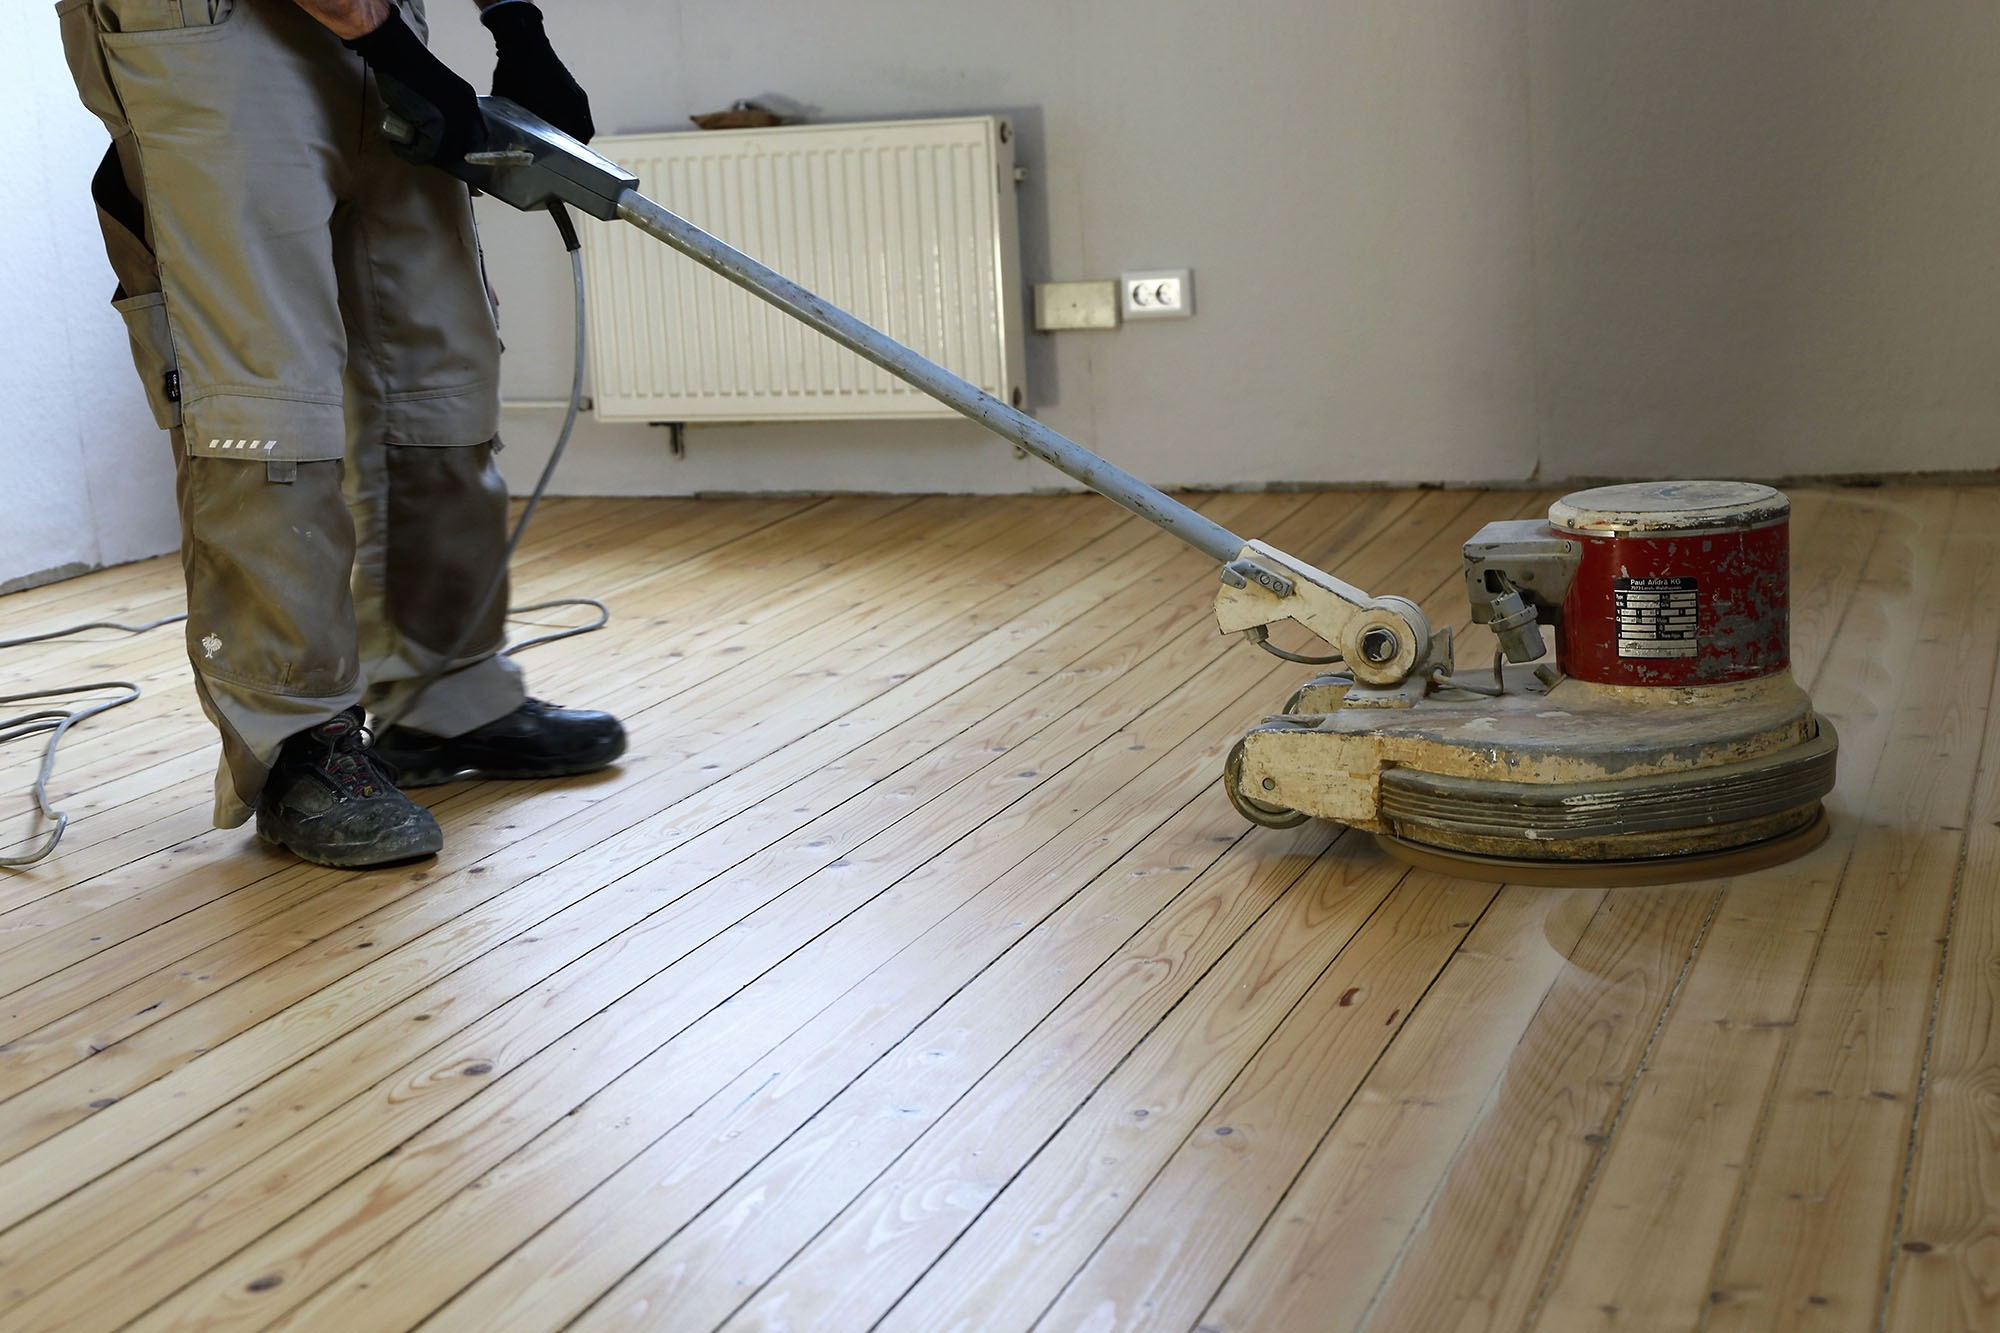
Floor sanding is a process of removing the top layer of a wooden or bamboo floor by sanding it with abrasive materials. Cork floors can also be sanded, but the process is different. Floor sanding is a great way to remove scratches, stains, and other imperfections from your floors. 

It can also restore the shine and make your floors look like new again. With floor sanding, you can also improve indoor air quality by removing dirt, dust, and other allergens that get trapped in your floors. 


Preparing for Floor Sanding 


Before you start sanding your floors, it's important to prepare the space. Remove all furniture from the room, including rugs and mats. Cover vents with plastic and tape to prevent dust from entering your HVAC system. 

Protect your walls by applying plastic or paper on them. After you have prepared the space, ensure you have the right tools and equipment for sanding your floors. These include sanders, edgers, vacuums, and respirators. 

Floor Sanding in Melbourne


Step-by-Step Guide to Floor Sanding 

Now that you have prepared your space and have the right tools let's get started on sanding your floors. Here is a step-by-step guide to help you sand your floors like a pro.  


  • Start with a coarse grit sandpaper 

Begin with a coarse-grit sandpaper, such as 36-grit. This will help you remove the top layer of your floor most efficiently. Sand in the direction of the wood grain, moving the sander in a circular motion. Keep the sander moving at all times to avoid creating dents on your floor.  


  • Move to a medium grit sandpaper

After you have finished sanding with the coarse grit sandpaper, move to a medium grit sandpaper, such as 60-grit. Sand in the same direction as before, moving the sander in a circular motion. This will help you remove any scratches left behind by the coarse grit sandpaper. 


  • Finish with a fine grit sandpaper

After you have finished sanding with the medium-grit sandpaper, move to fine-grit sandpaper, such as 120-grit. Sand in the same direction as before, moving the sander in a circular motion. This will help you achieve a smooth finish on your floor.  


  • Sand edges and corners with an edger

Use an edger to sand the edges and corners of your floor. Use the same grit sandpaper that you used on the rest of the floor. Sand in the direction of the wood grain, moving the edger in a circular motion.


  • Vacuum the floor

After you have finished sanding, vacuum the floor to remove any dust and debris. Ensure you clean up the edges and corners, too. Use a broom to sweep the floor and remove any remaining dust.

Finishing Your Floors

After sanding your floors, it's important to finish them to protect them from wear and tear. The type of finish you choose will depend on your preferences. Oil-based finishes are more durable, but they take longer to dry. Water-based finishes dry faster, but they are less durable. Here are some tips for applying finishes evenly. 


  • Use a brush or roller

Use a brush or roller to apply the finish evenly. Start from the centre of the room and work your way towards the edges. Apply the finish in thin coats and allow it to dry completely before applying another coat.


  • Avoid bubbles and streaks

To avoid bubbles and streaks, don't apply too much pressure when applying the finish. Allow the finish to flow naturally and avoid over-brushing. Apply the finish thinly and evenly, and allow each coat to dry completely before applying the next.

Maintaining Your Newly Sanded Floors

After floor sanding Melbourne and finishing your floors, it's important to maintain them to keep them looking great over time. Here are some tips for maintaining your newly sanded floors. 

  • Clean your floors regularly

Clean your floors regularly using a soft-bristled broom or a vacuum cleaner. Avoid using harsh chemicals or abrasive cleaners that can damage your floors. 


  • Use protective mats or rugs

Use protective mats or rugs in high-traffic areas to prevent damage to your floors. Avoid dragging heavy furniture across your floors, and use felt pads to protect your floors from scratches.  


  • Schedule periodic maintenance

Schedule periodic maintenance, such as re-coating or re-sanding, to keep your floors looking great over time. This will help you avoid expensive repairs in the future.


Final Thoughts 

Floor sanding is a great way to restore the beauty and functionality of your floors. With the right tools and equipment, anyone can master the craft of floor sanding. In this blog post, we have provided a step-by-step guide to help you sand your floors like a pro. We have also provided tips for finishing your floor sanding Melbourne and maintaining it over time.
 

Sunday, December 24, 2023

5 Reasons to Schedule Regular Carpet Polishing Services for Your Home

Maintaining a clean and welcoming home involves more than just regular dusting and sweeping. One often overlooked aspect is the condition of your carpets. Carpet polishing services might not be on your regular cleaning radar, but they should be! 

Here are five compelling reasons why scheduling regular Carpet Polishing Melbourne services can make a significant difference in the overall cleanliness and aesthetic appeal of your home.


Revitalize Your Carpets

Carpets endure a lot of wear and tear, from daily foot traffic to accidental spills. Over time, they can start to look dull and worn. This is where carpet polishing services come to the rescue. 

Professional carpet polishing not only removes stubborn stains but also revitalises the fibres, giving your carpets a fresh and vibrant appearance. Say goodbye to the tired and lifeless look and welcome back the plushness you fell in love with.


Extend the Lifespan of Your Carpets

Investing in quality carpets for your home is a decision that pays off in comfort and style. To protect this investment, regular maintenance is essential. Carpet polishing services play a crucial role in extending the lifespan of your carpets. 

The polishing process helps to keep the fibres intact, preventing premature wear and tear. By scheduling these services, you're not just cleaning your carpets; you're adding years to their life.


Carpet Polishing Melbourne


Create a Healthier Living Environment

Carpets are notorious for trapping dust, allergens, and bacteria. Regular vacuuming can only do so much. To truly create a healthier living environment for your family, consider the benefits of professional carpet polishing services. 

The specialised equipment and cleaning solutions used in the process effectively eliminate hidden pollutants, leaving your carpets not just clean but also contributing to better indoor air quality.


Enhance the Aesthetic Appeal of Your Home

Picture this: You walk into a room with impeccably clean and polished carpets. The difference in aesthetic appeal is undeniable. Professional carpet polishing Melbourne services go beyond cleanliness; they enhance the overall look and feel of your home. 

Whether you're entertaining guests or just enjoying a quiet evening with your family, the visual impact of well-maintained carpets is sure to leave a lasting impression.


Convenience and Time-Saving

In our busy lives, finding time for thorough carpet cleaning can be a challenge. This is where the convenience of professional carpet polishing services comes into play. Scheduling regular sessions means you can enjoy the benefits of clean and polished carpets without the hassle of doing it yourself. 

It's a time-saving solution that allows you to focus on what matters most while ensuring your home remains a clean and comfortable space.


Conclusion

Don't underestimate the impact that regular carpet polishing services can have on the overall condition of your home. From reviving the appearance of your carpets to creating a healthier living environment, the benefits are undeniable. 

So, why wait? Schedule your next carpet polishing Melbourne service and treat your home – and yourself – to the luxury of clean, vibrant carpets. Your living space will thank you for it!

Tuesday, December 19, 2023

Preserving Beauty: Essential Techniques for Decking Restoration

Decks are a perfect addition to any home, providing an excellent outdoor space to relax and entertain guests. However, to preserve the beauty of your deck, restoration and maintenance are essential.

 In this article, we will explore the essential techniques for Decking Restoration Melbourne, including preparation, restoration, and maintenance. By following these techniques, you can ensure your deck remains beautiful and functional for years to come.

Preparing for Restoration

Before commencing any deck restoration work, preparation is key. Proper preparation ensures that the restoration work is effective and long-lasting. Start by cleaning the deck using a power washer to remove dirt, grime, and debris. Next, inspect the deck for any damage, including rot, loose boards, or nails. Replace any damaged boards and tighten any loose nails or screws.

Decking Restoration Melbourne

After cleaning and repairing the deck, the next step is to sand it down. Use a sander with coarse grit sandpaper to remove any old stain or sealer from the deck. Sanding creates a smooth surface, allowing the new stain or sealer to penetrate the wood better. Finally, clean the deck again using a deck cleaner and allow it to dry completely before proceeding to the next step.

Restoring Your Deck

With the deck prepped, it's time to start the restoration process. Follow these essential techniques to restore your deck and bring back its beauty:


  • Staining

Staining is an important step in restoring your deck. It protects the wood from UV rays, water, and other elements. Choose a high-quality stain that penetrates the wood deeply and provides long-lasting protection. Apply the stain using a roller or brush, making sure to cover the entire surface. Let the stain dry for at least 24 hours before applying a second coat.


  • Sealing

Sealing provides an added layer of protection to your deck, preventing it from cracking, fading, or warping. It also enhances the appearance of the wood, giving it a glossy finish. Choose a high-quality sealer that provides UV protection and is water-resistant. 

Apply the sealer using a roller or brush, making sure to cover the entire surface. Allow the sealer to dry for at least 24 hours before using the deck. 


  • Painting

If you prefer a painted decking restoration Melbourne, use a high-quality exterior paint that is specifically designed for decks. Before painting, prime the deck with an exterior primer to prevent the paint from peeling or flaking. Apply the paint using a roller or brush, making sure to cover the entire surface. Allow the paint to dry completely before using the deck. 


In addition to these essential techniques, there are several common mistakes to avoid when restoring your deck. Avoid over-sanding the deck, as this can damage the wood. Also, don't apply too much stain or sealer, as this can cause the wood to become sticky or tacky. Finally, avoid using low-quality products, as they may not provide adequate protection or last as long as high-quality products.

Wrapping Up 

Deck restoration and maintenance are essential for preserving the beauty of your deck. By following the essential techniques outlined in this article, you can restore your deck and keep it looking beautiful for years to come. Remember to prep your deck properly, follow the essential decking restoration Melbourne techniques, and maintain your deck regularly.


Wednesday, December 13, 2023

The Ultimate Guide to Concrete Floor Polishing Techniques

Welcome to "The Ultimate Guide to Concrete Floor Polishing Techniques." This comprehensive blog post will walk you through everything you need to know about concrete floor polishing. Whether you're a homeowner looking to upgrade your floors or a professional contractor seeking to enhance your skills, this guide has got you covered.

Concrete Floor Polishing Melbourne is not just about aesthetics; it also offers numerous benefits. Polished concrete floors are durable, long-lasting, and easy to maintain. They provide a sleek and modern look to any space while being cost-effective compared to other flooring options. 

So, let's dive into the world of concrete floor polishing and explore techniques to help you achieve stunning results.


Understanding Concrete Floor Polishing

Before we begin, let's understand what concrete floor polishing is. Concrete floor polishing involves mechanically grinding and polishing the surface of concrete to create a smooth and glossy finish. This process enhances the floor's appearance and strengthens it, making it resistant to stains, spills, and wear and tear.

Not all concrete floors are suitable for polishing. Knowing the different types of concrete floors that can be polished is essential. Generally, newly poured, unsealed, and structurally sound concrete floors are ideal candidates for polishing. However, it's always best to consult with a professional to assess the condition of your floor before proceeding.

One of the major advantages of concrete floor polishing is its cost-effectiveness. Concrete floor polishing Melbourne is more affordable than other flooring options, such as hardwood or carpet. It eliminates the need for additional materials, such as tiles or laminate, and reduces maintenance costs in the long run.


Floor Polishing Melbourne


Preparing Your Concrete Floor for Polishing


Proper preparation is essential for achieving a flawless polished concrete floor. Here's a step-by-step guide on how to prepare your concrete floor:

  1. Clean the floor: Using a broom or vacuum cleaner, remove any dirt, dust, or debris. For stubborn stains, consider using a mild detergent or concrete cleaner.
  2. Repair imperfections: Inspect the floor for cracks, holes, or uneven surfaces. Fill any cracks or holes with a suitable concrete patching compound and level the surface using a trowel.
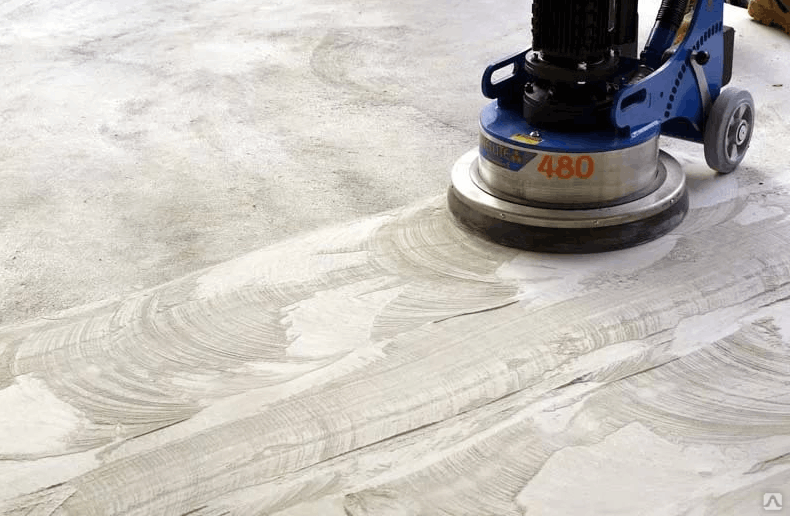
  3. Grind the floor: Use a concrete grinder with a diamond grinding disc to remove any existing coatings, adhesives, or sealants. This step ensures a clean and smooth surface for the polishing process.
  4. Densify the concrete: Apply a concrete densifier to the floor to increase its hardness and staining resistance. Follow the manufacturer's instructions for application and drying time.
  5. Polish the edges: Use a hand grinder or a small polishing machine to polish the edges and corners of the floor that are difficult to reach with a larger machine.

Proper preparation sets the foundation for a successful concrete floor polishing project. Take your time during this stage to achieve the best results.

Tools and Equipment Needed for Floor Polishing

To get started with concrete floor polishing, you'll need the following essential tools:

  1. Concrete grinder: A high-quality concrete grinder with diamond grinding discs is crucial for achieving a smooth and even surface.
  2. Diamond pads: Different diamond pads with varying grit sizes are used for different stages of the polishing process. Coarser grits are used for grinding, while finer grits are used for polishing.
  3. Wet/dry vacuum: A wet/dry vacuum is necessary for removing dust and debris during and after the grinding and polishing process.
  4. Polishing machine: A polishing machine with rotating diamond pads is recommended for larger areas. This machine helps in achieving consistent results across the entire floor.
  5. Safety equipment: Protect yourself by wearing safety goggles, ear protection, a dust mask, and non-slip shoes. Additionally, consider using knee pads for added comfort during the polishing process.

Always follow the manufacturer's instructions and safety guidelines for each tool and equipment used. Safety should always be a priority.

Step-by-step Process of Concrete Floor Polishing

Now that we have prepared the floor and gathered the necessary tools, let's dive into the step-by-step process of concrete floor polishing:

Step 1: Assessing the condition of your concrete floor

Before you begin the polishing process, evaluate the condition of your concrete floor. Look for any remaining imperfections or areas that require further repair. It's crucial to address these issues before proceeding to ensure a smooth and flawless finish.

Step 2: Surface preparation

Clean the floor thoroughly using a vacuum or broom to remove loose debris. Repair any remaining cracks or imperfections using a suitable concrete patching compound. Once the repairs are complete, grind the floor using a concrete grinder to remove any remaining coatings or sealants and create a level surface.

Step 3: Choosing the right diamond pads/grits

Select the appropriate diamond pads for each stage of the polishing process. Coarser grits, such as 30 or 50, are typically used for grinding to remove any remaining imperfections. Switch to finer grits, such as 100 or 200, for polishing as you progress. The final stages may require even finer grits, such as 400 or 800, to achieve a glossy finish.

Step 4: Dry vs. wet polishing

There are two main techniques for concrete floor polishing: dry and wet polishing. Dry polishing involves using a dust shroud with a vacuum to collect the generated dust. Wet polishing, on the other hand, utilises water to cool the diamond pads and eliminate dust. Both methods have their advantages, so choose the one that suits your needs and preferences.

Step 5: Polishing process

Attach the appropriate diamond pad to the polishing machine and begin polishing. Start with the coarsest grit and gradually work up to finer grits. Move the machine in a back-and-forth or circular motion, overlapping each pass to ensure even polishing.

Step 6: Applying sealant or polish enhancer

Once the desired gloss level is achieved, apply a sealant or polish enhancer to protect and enhance the appearance of the polished floor. Follow the manufacturer's instructions for application and drying time. Regular maintenance and reapplication of the sealant will keep your polished concrete floor looking its best.


Conclusion:

In conclusion, concrete floor polishing Melbourne is an excellent choice for achieving a sleek and modern look in any space. By following the step-by-step process outlined in this guide, you can transform your concrete floor into a stunning focal point. Remember to prioritise safety, invest in the right tools, and maintain your polished floor regularly to enjoy its benefits for years. So, go ahead and explore the world of concrete floor polishing, experiment with different techniques, and create a beautiful and durable floor you can be proud of.


Sunday, December 10, 2023

Shine Bright: The Ultimate Guide to Tile Cleaning Solutions

Hello there, dear readers! Welcome to our ultimate guide on Tile cleaning Melbourne solutions. We're thrilled to have you here as we embark on a journey towards clean and shiny tiles. 

Maintaining spotless tiles not only enhances the beauty of our homes but also contributes to a healthy and hygienic living environment. With this comprehensive guide, we aim to equip you with all the knowledge and tools you need to achieve your desired results. So, let's dive in and make those tiles shine bright!


Understanding Tile Types:

Before we begin our tile cleaning adventure, it's important to understand the different types of tiles we may encounter. The most common types include ceramic, porcelain, and natural stone tiles. Each type has its unique characteristics and cleaning requirements. 

Ceramic tiles are sturdy and relatively easy to clean, while porcelain tiles are more resistant to staining. Natural stone tiles, such as marble or granite, require more specialized care. Identifying the type of tile in your home is crucial as it determines the most suitable cleaning approach.

Tile cleaning Melbourne


Essential Tools and Supplies:

To effectively clean your tiles, you'll need a few essential tools and supplies. A mop, bucket, and scrub brush are must-haves for every tile cleaning arsenal. Opting for eco-friendly cleaning supplies is not only safer for you and your family but also better for the environment. 

Look for gentle cleaning solutions that are suitable for various tile materials. Additionally, there are some optional tools that can come in handy for deeper cleaning or tackling specific issues, such as grout brushes or steam cleaners.


Preparing for Tile Cleaning:

Before you start the actual cleaning process, it's essential to prepare the area properly. Remove any loose debris from the tile surface by sweeping or vacuuming. 

This ensures that you're not spreading dirt or dust around while cleaning. To protect nearby surfaces from accidental spills or splashes, lay down drop cloths or plastic sheets. Taking these simple steps will make your tile cleaning endeavor a lot smoother.


Homemade Tile Cleaning Solutions:

For those who prefer a more DIY approach, we have a range of homemade tile cleaning solutions that can be made using common household ingredients. 

These solutions are not only effective but also budget-friendly. We'll provide you with recipes to tackle different types of stains, such as grout stains or soap scum. With step-by-step instructions, you'll be able to mix and apply these homemade remedies with ease. 

Proper Tile Cleaning Techniques:

Now that we have our tools and cleaning solutions ready, let's dive into the proper tile cleaning techniques. We'll cover three main areas: general cleaning, grout cleaning, and deep cleaning.

General Cleaning:

When it comes to general cleaning, it's important to mop or wipe tiles correctly to avoid streaks or residue buildup. We'll guide you on suitable cleaning motions and frequency for regular maintenance. With the right techniques, you'll be able to maintain clean and shiny tiles effortlessly.

 Grout Cleaning:

Dirty grout lines can be a real eyesore, but fear not! We'll walk you through effective techniques for tackling grout stains. We'll recommend specialized grout cleaners or homemade remedies for stubborn stains. Moreover, we'll provide you with tips to prevent future grout discoloration or mold growth, ensuring your grout stays clean and fresh.

Deep Cleaning:

For heavily soiled tiles, a deep cleaning session may be necessary to restore their beauty. We'll inform you about various deep cleaning methods, such as steam cleaning or using a tile and grout scrubber. However, we'll also caution you about potential risks and the need for professional assistance in extreme cases. Safety first!


Maintenance and Long-Term Care:

Once you've given your tiles a thorough cleaning, it's important to maintain their shine in the long run. We'll share valuable tips on maintaining clean tiles after the initial deep cleaning process. 

Regular maintenance routines, such as sweeping or wiping, will prevent dirt buildup. We'll also suggest preventive measures like using mats, sealing grout, or utilizing area rugs to protect your tiles from wear and tear.


Conclusion:

Congratulations, dear readers! You've reached the end of our ultimate guide to tile cleaning Melbourne solutions. We hope you found this comprehensive resource helpful in your quest for clean and shiny tiles. 

Remember, with the right tools, cleaning solutions, and techniques, your tiles can truly shine bright. So, take action and implement the tips and recommendations provided. Embrace your tile cleaning journey and enjoy the sparkling results. Your shiny tiles are within reach!


Sunday, December 3, 2023

The Art of Refinement: Achieving Perfection through Floor Sanding

Welcome to our blog, where we are going to dive deep into the world of floor sanding. Whether you're a homeowner looking to transform worn-out floors or a contractor seeking to enhance the appearance of a space, Floor Sanding Melbourne can be a game-changer.  

In this blog post, we will explore the ins and outs of floor sanding, discuss its benefits, and provide a step-by-step guide. Floor sanding is the process of removing the top layer of a wooden floor to reveal a fresh and appealing surface. By sanding the floor, you can restore its former glory and enhance the overall aesthetic of any space.


Benefits of Floor Sanding

The benefits of floor sanding are numerous, both in terms of aesthetics and functionality. From a visual standpoint, sanding can breathe new life into tired-looking floors, making them appear brighter, cleaner, and more inviting. 

It can also help to remove deep scratches and stubborn stains that regular cleaning methods fail to eliminate. Additionally, Floor sanding Melbourne can improve the overall value and marketability of a property, making it an excellent investment for homeowners and real estate professionals alike.

 Floor Sanding Melbourne

A Step-by-Step guide to floor sanding


Step 1: Preparing the Area

Before you begin sanding, clear the room of furniture and objects. This will allow you to move freely and avoid any obstacles that may hinder the sanding process. Additionally, ensure proper ventilation by opening windows or using fans to minimize the buildup of dust and fumes.


Step 2: Inspecting the Floor

Take a close look at the floor and identify any loose boards, nails, or damaged sections. Make any necessary repairs before proceeding with sanding to ensure a smooth and even surface. 

Step 3: Choosing the Right Grit 

Different floors require different grit levels to achieve optimal results. Coarse-grit sandpaper is typically used for initial sanding to remove old finishes, paint, or deep scratches. As you progress, switch to finer-grit sandpapers for intermediate and fine finishing. It's important to choose the right grit sequence based on your floor's condition to achieve the desired outcome. 

Step 4: Initial Sanding 

Start with the coarse-grit sandpaper and use the floor sander to move in a consistent direction, maintaining even pressure. This step will remove the top layer of the floor and prepare it for the subsequent sanding stages. Be sure to cover the entire floor surface evenly to avoid any uneven patches. 

Step 5: Intermediate Sanding

Once you have completed the initial sanding, switch to finer-grit sandpapers to achieve a smoother finish. Again, move in a consistent direction, overlapping each pass to ensure uniformity. Pay close attention to any areas that may require extra attention, such as high-traffic areas or spots with deep scratches. 

Step 6: Fine Finishing

For the final touches, use very fine-grit sandpapers to eliminate any remaining imperfections and achieve a polished look. Take your time during this stage and pay attention to detail. Any small imperfections left behind can be noticeable once the floor is finished, so be thorough in your sanding. 

Step 7: Cleaning Up

After completing the sanding process, it's important to remove all dust and debris from the sanded area. Use a vacuum cleaner, broom, or damp cloth to ensure a thorough clean-up. This step is crucial before applying any finishes or sealants to the floor. 

Conclusion

In conclusion, floor sanding is a transformative process that can breathe new life into worn-out floors. Whether you're a homeowner looking to revitalize your living space or a contractor seeking to enhance a property's value, floor sanding is a worthwhile investment. Get started on your floor sanding Melbourne and enjoy the benefits of a beautifully restored floor.